Proxmox openHAB Titel

openHAB 4 Snapshot als Proxmox Container

cropped Profilbild JoergKarstenVeröffentlicht von

Als Zentrale für das Smarthome benutze ich openHAB. Um openHAB in einem Container in Proxmox laufen zu lassen müssen wir erst einmal ein Container erstellen.

Container

Das erstellen eines openhab Containers in Proxmox habe ich in dem Artikel Proxmox Container erstellen und Unifi Controller installieren beschrieben. Ich werde deswegen nur noch die Einstellungen die ich gesetzt habe auflisten. Folgende Einstellungen habe ich gemacht:

  • Hostname: openHAB
  • Passwort: ist gesetzt
  • Template: debian-11-standard_11.3-1_amd64
  • Disk-Größe: 32 GB
  • Kerne: 2
  • Speicher & Swap: 2048 MB
  • IPv4 Adresse: 192.168.x.y/24 (muss jeder selber wissen)
  • Gateway: 192.168.x.z (muss jeder selber wissen)
  • DNS domain: blue-pc.net
  • DNS Server: 208.67.222.222

Installation Java

Als erstes machen wir nach dem Start einmal ein Update des Systems.

Plain text
Copy to clipboard
Open code in new window
EnlighterJS 3 Syntax Highlighter
apt update && apt install

Danach müssen wir Java jdk 17installieren. Ich werde Azul Zulu installieren. Ich installiere jdk 17 da ich die Snapshot Version 4.0 installiere und diese benötigt 17. Die openHAB Version 3.4 benötigt jdk 11.

Als erstes muss das Repositorie eingerichtet werden. Dazu benötigt man die folgenden Befehle, die ihr auch auf der Webseite vom Hersteller findet (nur ohne sudo).

Plain text
Copy to clipboard
Open code in new window
EnlighterJS 3 Syntax Highlighter
# install the necessary dependencies
apt-get -q update
apt-get -yq install gnupg curl
# add Azul's public key
apt-key adv --keyserver hkp://keyserver.ubuntu.com:80 --recv-keys 0xB1998361219BD9C9
# download and install the package that adds
# the Azul APT repository to the list of sources
curl -O https://cdn.azul.com/zulu/bin/zulu-repo_1.0.0-3_all.deb
# install the package
apt-get install ./zulu-repo_1.0.0-3_all.deb
# update the package sources
apt-get update
# install the necessary dependencies apt-get -q update apt-get -yq install gnupg curl # add Azul's public key apt-key adv --keyserver hkp://keyserver.ubuntu.com:80 --recv-keys 0xB1998361219BD9C9 # download and install the package that adds # the Azul APT repository to the list of sources curl -O https://cdn.azul.com/zulu/bin/zulu-repo_1.0.0-3_all.deb # install the package apt-get install ./zulu-repo_1.0.0-3_all.deb # update the package sources apt-get update
# install the necessary dependencies
apt-get -q update
apt-get -yq install gnupg curl 

# add Azul's public key
apt-key adv --keyserver hkp://keyserver.ubuntu.com:80 --recv-keys 0xB1998361219BD9C9

# download and install the package that adds 
# the Azul APT repository to the list of sources 
curl -O https://cdn.azul.com/zulu/bin/zulu-repo_1.0.0-3_all.deb

# install the package
apt-get install ./zulu-repo_1.0.0-3_all.deb

# update the package sources
apt-get update

Danach folgt das eigentliche Java Package mit:

Plain text
Copy to clipboard
Open code in new window
EnlighterJS 3 Syntax Highlighter
# install Azul Zulu JDK 17
apt-get install zulu17-jdk
# install Azul Zulu JDK 17 apt-get install zulu17-jdk
# install Azul Zulu JDK 17
apt-get install zulu17-jdk

Nun können wir prüfen ob Java auch funktioniert und die richtige Version aktiv ist.

Plain text
Copy to clipboard
Open code in new window
EnlighterJS 3 Syntax Highlighter
root@openHAB:~# java -version
openjdk version "11.0.17" 2022-10-18 LTS
OpenJDK Runtime Environment Zulu11.60+19-CA (build 11.0.17+8-LTS)
OpenJDK 64-Bit Server VM Zulu11.60+19-CA (build 11.0.17+8-LTS, mixed mode)
root@openHAB:~# java -version openjdk version "11.0.17" 2022-10-18 LTS OpenJDK Runtime Environment Zulu11.60+19-CA (build 11.0.17+8-LTS) OpenJDK 64-Bit Server VM Zulu11.60+19-CA (build 11.0.17+8-LTS, mixed mode)
root@openHAB:~# java -version
openjdk version "11.0.17" 2022-10-18 LTS
OpenJDK Runtime Environment Zulu11.60+19-CA (build 11.0.17+8-LTS)
OpenJDK 64-Bit Server VM Zulu11.60+19-CA (build 11.0.17+8-LTS, mixed mode)

Installation openHAB im Proxmox Container

Natürlich findet man eine gute Beschreibung auch auf der openHAB Seite.
Für openHAB muss als erstes ein Key installiert werden.

Plain text
Copy to clipboard
Open code in new window
EnlighterJS 3 Syntax Highlighter
curl -fsSL "https://openhab.jfrog.io/artifactory/api/gpg/key/public" | gpg --dearmor > openhab.gpg
mv openhab.gpg /usr/share/keyrings
chmod u=rw,g=r,o=r /usr/share/keyrings/openhab.gpg
curl -fsSL "https://openhab.jfrog.io/artifactory/api/gpg/key/public" | gpg --dearmor > openhab.gpg mv openhab.gpg /usr/share/keyrings chmod u=rw,g=r,o=r /usr/share/keyrings/openhab.gpg
curl -fsSL "https://openhab.jfrog.io/artifactory/api/gpg/key/public" | gpg --dearmor > openhab.gpg
mv openhab.gpg /usr/share/keyrings
chmod u=rw,g=r,o=r /usr/share/keyrings/openhab.gpg

Danach können wir die eigentliche Installation starten. Ich werde die Snapshot (unstable) Version verwenden. Dazu folgende Befehle ausführen.

Plain text
Copy to clipboard
Open code in new window
EnlighterJS 3 Syntax Highlighter
echo 'deb [signed-by=/usr/share/keyrings/openhab.gpg] https://openhab.jfrog.io/artifactory/openhab-linuxpkg unstable main' | tee /etc/apt/sources.list.d/openhab.list
apt-get update
apt-get install openhab
systemctl daemon-reload
systemctl enable openhab.service
systemctl start openhab.service
echo 'deb [signed-by=/usr/share/keyrings/openhab.gpg] https://openhab.jfrog.io/artifactory/openhab-linuxpkg unstable main' | tee /etc/apt/sources.list.d/openhab.list apt-get update apt-get install openhab systemctl daemon-reload systemctl enable openhab.service systemctl start openhab.service
echo 'deb [signed-by=/usr/share/keyrings/openhab.gpg] https://openhab.jfrog.io/artifactory/openhab-linuxpkg unstable main' | tee /etc/apt/sources.list.d/openhab.list

apt-get update

apt-get install openhab

systemctl daemon-reload
systemctl enable openhab.service
systemctl start openhab.service

Danach sollte openHAB unter der URL http://192.168.X.Y:8080/ erreichbar sein. Im ersten Schritt muss man ein Benutzernamen und ein Passwort eingeben und danach die Sprachen einstellen, sowie die Position.

Danach erscheint die Oberfläche von openHAB.
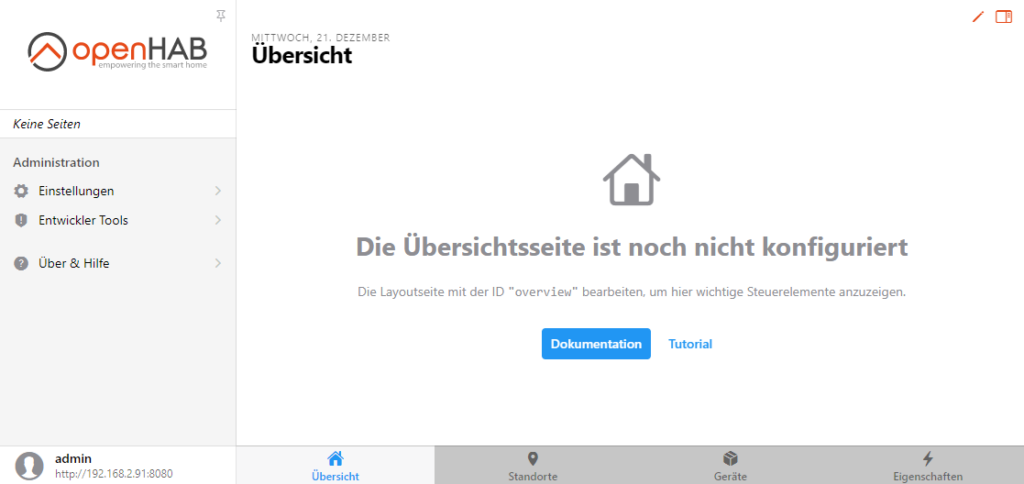
Oberfläche von openHAB

Kommentar hinterlassen